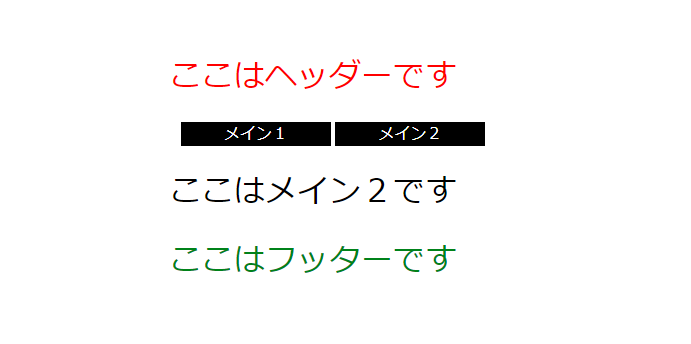
Vue Routerを利用した画面のヘッダーにナビゲーションを作成し画面を遷移させます。
Vueファイルの修正
こちらで作成した画面のHeader.vueを修正します。
src/components/Header.vue
router-linkタブはデフォルトだと、aタグ扱いになります。
liタグにするために「tag=”li”」を追加しています。
to=”/” と to=”/Main2″ にて画面遷移を実現しています。
<template>
<div class="Header">
  <h1>{{ msg }}</h1>
    <nav>
      <ul>
        <router-link tag="li" id="home-nav" to="/" exact><a>メイン1</a></router-link>
        <router-link tag="li" id="game-nav" to="/Main2"><a>メイン2</a></router-link>
      </ul>
    </nav>
</div>
</template>

<script>
export default {
  name: 'Header',
  data () {
    return {
      msg: 'ここはヘッダーです'
    }
  }
}
</script>

<!-- Add "scoped" attribute to limit CSS to this component only -->
<style scoped>
h1, h2 {
  color: red;
  font-weight: normal;
}

nav li {
  text-align: center;
  color: white;
  background-color: black;
  display: inline-block;
  list-style: none;
  width: 150px;
}

nav li a {
  text-decoration: none;
  color: #fff;
}
</style>
サンプル画面
サンプル画面はこちらです。